Skip to main content
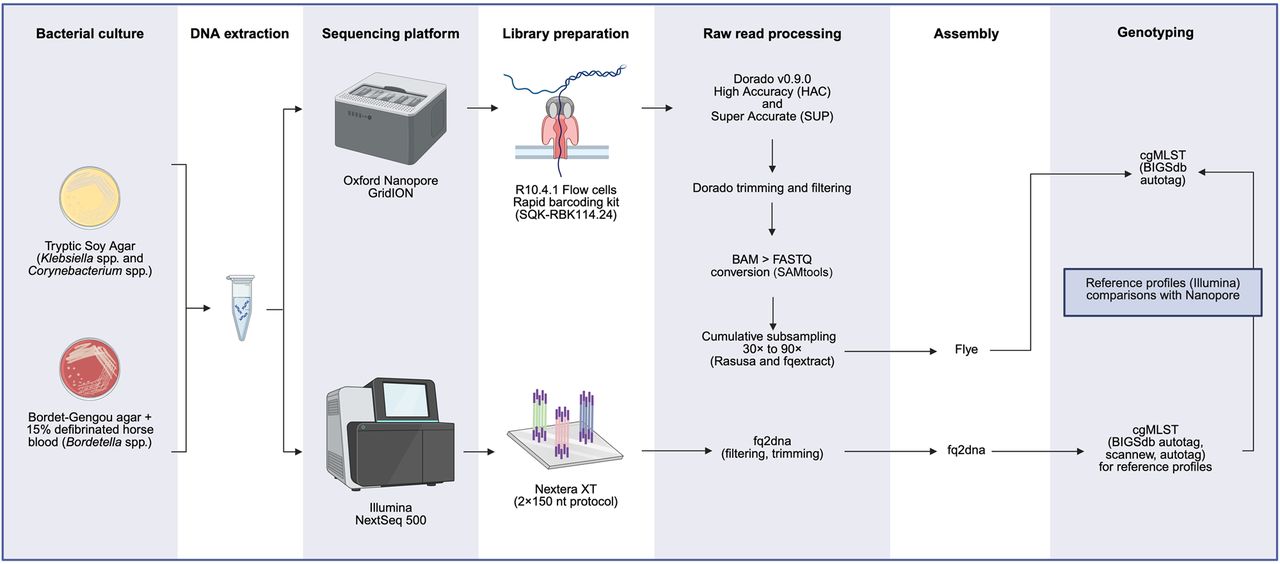
Figure 3.
Graphical summary showing the experimental workflow followed in this study.