Skip to main content
Figure 2
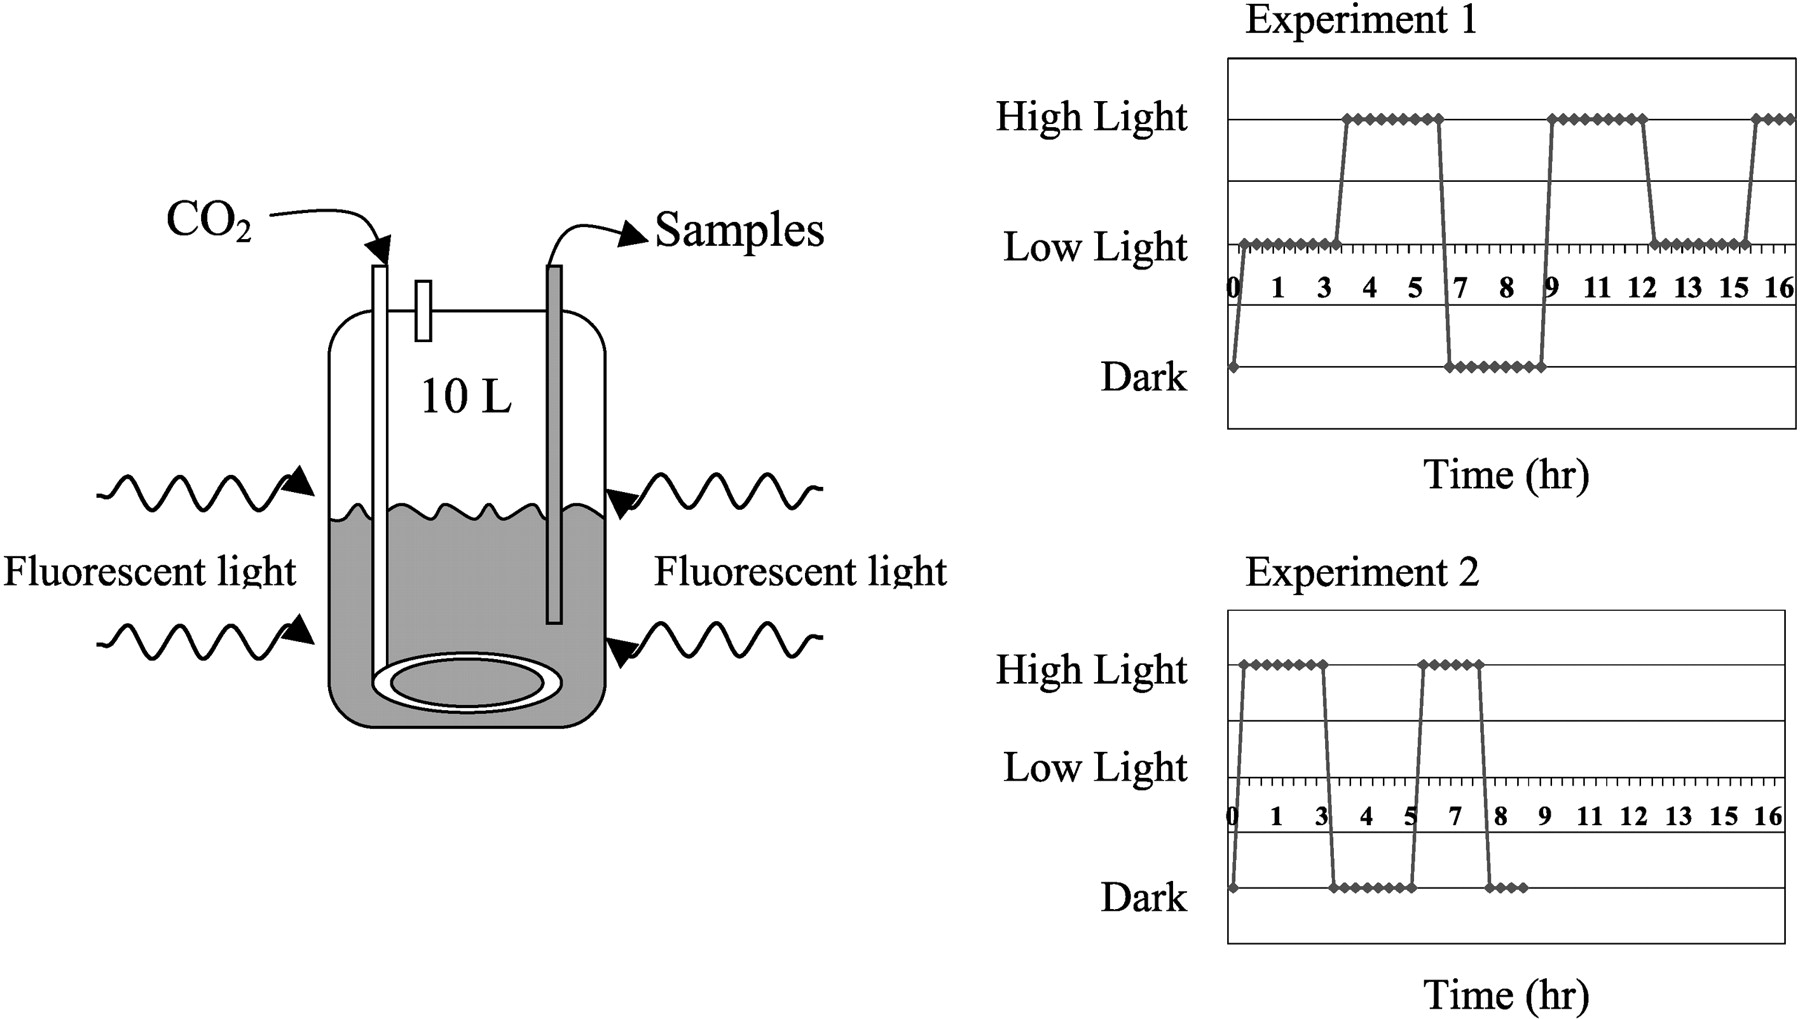
Experimental set-up and light intensity profiles for both experiments.